If you came here for the best landing spots warzone tips, you’re my kind of person. I’ve been dropping hot (and sometimes gloriously cold) since Verdansk was still a fresh meme and everybody thought Superstore was a personality trait. In my experience, picking a drop zone isn’t just about luck. It’s about risk, loot density, rotations, and how fast you can get a Loadout or a decent gun with a sight that doesn’t make you cry. I’ve always found that good Warzone landing zones share the same bones: strong early-game loot, clear exits, contracts nearby, and ways to avoid getting third-partied into a rage-quit. Think hot drops, high tier loot areas, early contracts, Strongholds, buy station proximity, and those sneaky rotation lines. Yes, I’m talking Vondel canals, Urzikstan bridges, Fortune’s Keep cliffs, and Rebirth rooftops. If you’re here to win while still having fun? Cool. If you want chaos? Also cool. I have ideas for both.
How I actually pick a drop (I keep it stupid simple)

When I’m calling the first ping, I run through three dumb little rules in my head. They’re not fancy. But they work.
- Rule 1: Money first. If I can’t buy a UAV or Loadout early, that spot goes in the trash. I want cash stacks, safes, or reliable ground loot.
- Rule 2: A clean exit. Rotations matter. Give me ziplines, water routes, redeploy drones, a vehicle, or rooftops with cover.
- Rule 3: Third-party insurance. If two squads crash, can I third-party them? Or run? I need power positions and angles, not a flat parking lot.
That’s it. Not deep. But somehow people still belly-flop into POIs with one door and nowhere to hide. Don’t be that person.
Mini “table” of my go-to drops (fast reference)
-
Urzikstan — City high-rises (coastal cluster)
- Risk: High
- Why: Elevators, zips, cash, contracts, insane vertical control
- Rotate: Bridges, water taxis, train, rooftops
-
Urzikstan — Power Plant (west side)
- Risk: Medium
- Why: Consistent loot, decent money, decent cover
- Rotate: Road vehicles, hillside, river
-
Vondel — Museum / City Hall block
- Risk: Medium-high
- Why: Roof angles, canals for resets, buy station spawns nearby
- Rotate: Canals, rooftops, zips
-
Fortune’s Keep — Smuggler’s Cove
- Risk: Medium
- Why: Safe-ish, cash crates, sneaky caves, easy rotate to Keep/Town
- Rotate: Cliffs, ropes, boats
-
Rebirth Island — Control / HQ ridge
- Risk: High
- Why: Early power, roof control, third-party central
- Rotate: Prison roof, Living Quarters, Harbor zip
-
Ashika Island — Town Center roofs
- Risk: Medium-high
- Why: Roof wars, decent loot, water escape, contracts
- Rotate: Bridge, canals, Castle caves
That’s the quick and dirty. If you want the long version (with the spicy takes), keep going.
Map-by-map: where I actually land and why
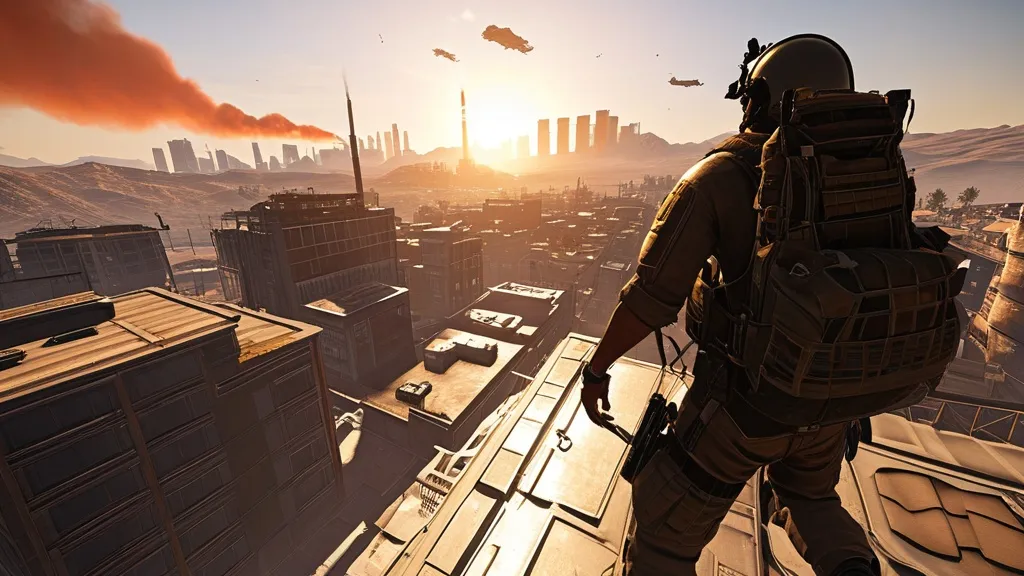
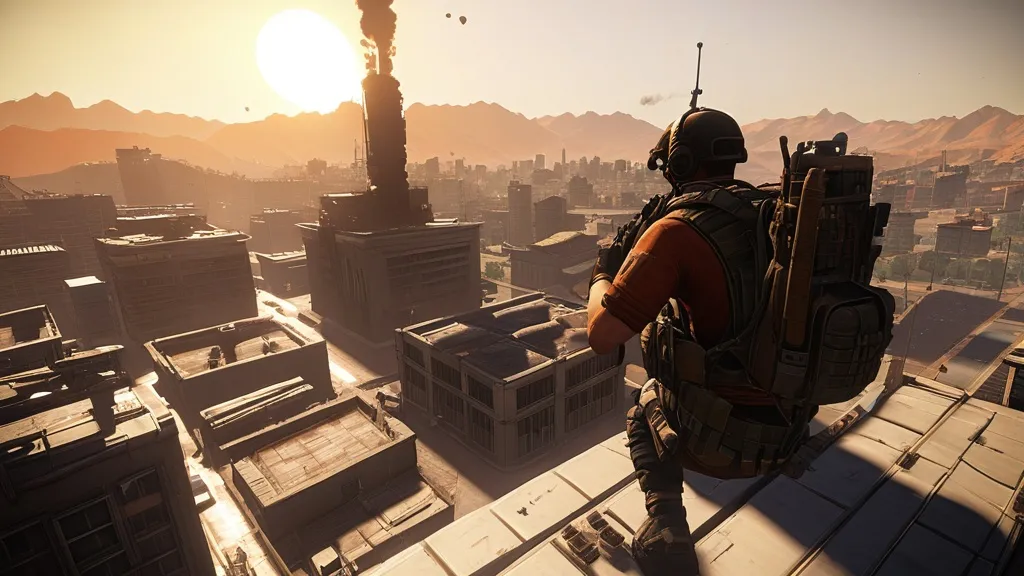
Urzikstan (BR)
Modern map. Big spaces. Aggro teams love it because there’s room to chase and get chased. In my head, Urzikstan plays like a huge triangle: coast city, central fields, northern military/ridge. I decide drops based on flight path and where I can get money fast without getting laser-beamed from three rooftops at once.
Coastal City High-Rises
My personal favorite if the path is side-on. Why? Elevators and ziplines. You get early vertical control and strong lines of sight for third-party angles. In my experience, there’s always a contract or two and enough cash to pop a UAV if you move quickly. The trick is not to tunnel-vision everyone below you. Clear your roof, hit a contract, then push one building over. Control a pair of roofs instead of one. You’ll win more.
- Good for: Early picks, rooftop reset, mid-game rotations.
- Bad for: People who hate ladders or get dizzy on zips.
- Exit: Bridge line to inland, or hop rooftops to a buy. Water is your emergency escape route.
Power Plant (Popov Power, west side)
Lower chaos. Still great loot. Safecracker or Intel contracts make this spot a money printer. I usually grab a contract, clear a couple buildings, and slide out before the city squads rotate. The ridges nearby give you cover to reposition. Vehicles spawn often enough to not make you cry.
- Good for: Quieter early game, fast cash, balanced fights.
- Bad for: Squads who need non-stop PvP in the first minute.
- Exit: Road vehicle to circle edge, or footpath through rocks with line-of-sight breaks.
Resort / Coastal Villas (north-west)
Loot is solid here, and the views are nice, which matters to literally nobody in a firefight. Still, this is a decent “reset” area. I land here if the flight path is the opposite side and everyone is making poor choices. You can third-party city fights with high ground angles. If a Stronghold opens nearby, you’re in a great position.
Military / Ridge Cluster
When circle pulls north early, I like grabbing a squad wipe or two in the smaller compounds near the base, then slipping up to the ridge. Snipers feast here. Rotations are simple: ridge to ridge. Just mind the plate economy. If you have no plates and someone has a Cronen Squall flashback moment? Not fun.
Vondel (Resurgence)
I love Vondel because it rewards clever movement. Rooftops, canals, short sightlines—lots of ways to outplay cracked teenagers with better reflexes than sleep schedules. If you understand rotations here, you print wins.
Museum / City Hall Block
Good rooftops. Good cover. Usually a buy station spawn close enough to matter. I drop roof, clear fast, and jump to the opposite roof using the canopy or a zip. The canals are your emergency reset. I’ve swam away from fights here more times than I can count—people rarely check the water properly unless they’re try-hards who aim like dolphins.
- Good for: Balanced fights, contracts, mid-game control.
- Bad for: People who panic-jump into the canal and forget they can look up and armor.
Floating District / Canals
If you’re playing sneaky, this is your playground. Boats, bridges, and lots of angles. I like to ping a contract, pop a UAV later, and pinch. You don’t hold this forever; you use it to stage kills. Then rotate to Castle side or Stadium if circle says so.
Zoo Rooftops
Underrated. Nice high-low fights, decent money, controllable entrances. Rotate outward if you hear third-parties stacking. This is where my squad gets early picks and positions for the late game. Plus, you can jump between roofs like budget Spider-Man.
Fortune’s Keep (Resurgence)
This map is pure dopamine. Up-down, left-right, caves, ropes, cliffs. If you like controlling verticality, you’ll be happy here.
Smuggler’s Cove
I land here when I want loot and smart rotations without 12 teams in my pocket. The caves and cliff ropes let you slide into Keep or Town on your terms. Grab cash crates, buy plates early, and you’ll be laughing while third-parties implode at the Keep.
- Good for: Money, safe-ish fights, flexible rotation.
- Exit: Rope to cliffs. Rotate to Keep roof or swing to Gatehouse.
Keep (the castle)
Listen, it’s a circus. But a profitable one. If you’re warmed up and your team has comms, Keep can win you the lobby by minute three. Clear one segment at a time. Don’t ego-chow across the courtyard without a smoke. People love angle-holding here. Respect it.
Winery
Winery is the nerd pick. And I mean that with love. Solid loot, good cover, and great lines to rotate into high ground. I like grabbing a contract here, buying early, then gatekeeping the low side. It’s chill until it isn’t.
Rebirth Island (Resurgence)
Rebirth came back and reminded everyone why we fell in love with fast-paced randomness. It’s a classic. It rewards smart aggression and punishes bad timing. Everything’s close. Your mistakes are loud.
Control / HQ ridge
Still my favorite. You get fast roof control with easy third-party into Prison or Living. The ridge lets you pivot quickly. If you’re feeling confident, slide into Prison roof and bully the windows. If not, hold the edges and farm pushes.
Prison Roof
High risk, high “hello, entire server” energy. When it works, you own the map. When it fails, you’re a spectator with snacks. Land opposite of the most crowded side, then sweep clockwise. Stay moving. Standing still here is asking for beams.
Harbor / Decon line
Safer early option. Quick loot, easy rotate up to Control, and decent buy access. I do this when I want to warm up without becoming someone’s TikTok clip in the first thirty seconds.
Ashika Island (Resurgence)
Ashika is sneaky. People underestimate it because they remember getting farmed at Castle. But the map is actually great if you use water and caves right. Ashika rewards players who think in layers.
Town Center Rooftops
My go-to. Lots of roof fights, decent loot, and quick access to bridges and canals. If things go south, jump into the water and rotate left under the bridge. You’ll reset while your attackers guess wrong. Works far more often than it should.
Beach Club
Another “reset-friendly” zone. Water rotations. Good loot density. It’s nice when the first circle favors the coast. Contracts here are often unbothered early, which is weird and wonderful.
Tsuki Castle (but smart)
Castle is chaos, but if you land on the outer roofs and work inward, you can control it. People drop center like moths to a lamp. Don’t be a moth. Be the person turning the lamp off.
Hot drops vs. safe loot: how I decide on the fly
Quick rules I use right off the plane:
- If the plane path cuts straight over a top POI, I mark a second-best POI off-angle. Arrive 10 seconds later. Third-party the winners.
- If the circle is far, I grab a contract near a vehicle. Intel or Safecracker. Get money, rotate, breathe.
- If I’m queueing solo? I pick rooftops with two exits. Zips or ladders and a fall line. Never land in a bowl.
- If it’s quads and we’re sweaty? We hit the busy spot, chain plates, and keep moving like we owe someone rent.
Contracts and buy stations: my real early game “win” button
What I think is underrated: knowing which contract to grab for your drop style. On bigger maps, I like Intel first if it’s quiet (free cash, safe record). If the lobby is hyper-aggressive, Safecracker gives you economy fast. On Resurgence maps, I’ll snag a Bounty if I’m feeling spicy. Pop a UAV if the buy is close. The first buy matters so much because your Loadout and plates define your fights more than people admit.
Also, pay attention to the current meta and bug fixes. I skim patch notes before I jump in because one tiny change to spawn rates can turn a “meh” POI into a gold mine. Example: loot rarity tweaks, Stronghold timing, or buy station changes have straight up flipped my landing preferences more than once.
Strongholds, Black Sites, and when I actually chase them
I’ve always found that Strongholds make sense if you’re nearby and kitted. Don’t fly half the map naked to contest five teams who already posted up. If you’re two buildings away and you’ve got smokes, go. If not, farm cash and catch them on the rotate. Black Sites are a “win-more” move. Great if you’re cooking. Overkill if you’re playing from behind.
Secondary tips nobody asked for but I’m giving anyway
- Carry smokes. Yes, even in Resurgence. Smokes save lives. Yours, usually.
- Audio is a liar. Footsteps get weird. Clear angles with your eyes too.
- Pre-aim ladders. Pre-aim zips. People are predictable. Use it.
- UAV timing: one while you loot, one when you push, one after the third-party arrives. Beautiful.
- On Vondel, use canals more. Water is a free rotate if you don’t panic.
- On Rebirth, slide-cancel your brain, not your feet. Move with purpose, not just habit.
- On Urzikstan, don’t ignore rail lines and bridges. They’re funnels and lifelines both.
My mildly controversial takes
Stop landing at the “famous” name just because a streamer did it yesterday. The servers shift. The meta shifts. The player flow shifts. Drops aren’t sacred. If a POI that used to be fire suddenly feels like a public firing range? It probably is. Shift to the next block over and farm the people who didn’t adapt.
Also, grabbing the first gun you see and sprinting at gunshots is not a strategy. It’s cardio. Fun, sure. But if you want wins? Get plates. Get info. Then push.
Meta and map context for newer players
If you’re new to this, Warzone pulls from the Modern Warfare titles. The big drop-based chaos comes from the battle royale format, and Warzone itself has hopped generations since the original release under the Modern Warfare (2019) umbrella. If you want a fast primer on what Warzone even is, the Wikipedia page lays it out cleanly. I won’t pretend Wikipedia has the meta, but it’s a decent start if your cousin keeps asking what “resurgence” means.
Quick “playstyle tables” (okay, lists) you can actually use
If you want high-kill games
- Urzikstan: City high-rises, then push toward the nearest buy. Snag a UAV. Hunt.
- Vondel: Museum roof start. Chain fights across the street lines. Use canals to reset.
- Rebirth: Control to Prison sweep. Keep plates flowing. Don’t camp. It’s a death sentence.
If you want consistent top 5s
- Urzikstan: Power Plant or Resort. Grab contract. Buy early. Rotate to high ground.
- Fortune’s Keep: Smuggler’s Cove to Keep roof late. Don’t over-fight midgame.
- Ashika: Town Center roof start. Quietly third-party Castle or Port. Avoid center early.
If you’re solo
- Pick rooftops with two exits. Ladders and a fall line.
- Contracts > ego. Money makes your Loadout show up faster than wishful thinking.
- Fight only if you have a plate advantage or position. Otherwise, rotate.
Rotations: the unsexy thing that wins games
I map my path before I land. Sounds nerdy. It is. I live. That’s the point. If I drop Museum on Vondel, I’m already thinking: museum roof, city hall, canal reset, stadium side if circle goes north. On Urzikstan, if I start coastal, I mark bridge exits and one inland buy. If I’m late to circle, I move on the slow side with cover. If I’m early, I hold power positions and gatekeep. You can feel the lobby’s flow after two minutes. Ride it. Don’t fight it.
Guns, perks, and settings that actually support good drops
Keep your TTK expectations honest. If your main AR beams at mid-range, you can win roof fights. If it’s a potato, you won’t. I run a fast-handling SMG and a controllable AR for rooftops. On Resurgence, I favor Restock and smokes. On BR, I pick Ghost later if the lobby is sweaty. Having the right setup matters more than picking a flashy POI. But picking a smart POI makes finding that setup faster. Circle of life, or something.
A word on adapting to changes (and why I reroute often)
Every patch nudges the flow. Spawns, contract rewards, loot weight—small tweaks, big impact. I watch how players move for the first day or two after updates, then I change my drop list. If loot gets buffed around Vondel’s Museum, I go there until the herd follows. Then I slide one block over and farm the space they just abandoned. It’s mean. It works.
Five drops I’ll defend to the grave this season
- Urzikstan City (roofs): The most control for teams with comms.
- Urzikstan Power Plant: Reliable money, manageable heat.
- Vondel Museum: Rooftop fights with clean resets.
- Smuggler’s Cove (Fortune’s): Smart pathing, easy wins.
- Control / HQ (Rebirth): Momentum machine if you don’t throw.
What I avoid unless I’m trolling
- Dead-end compounds with one staircase. No exit, no thanks.
- Middle of a field. Unless you’re doing cardio again.
- The obvious streamer hotspot when the plane flies straight over it. I’ll go second wave and third-party. Much better.
One last pass at the point
Picking drops isn’t magic. If you want to climb, think economy, exits, and third-party angles. Across Urzikstan, Vondel, Fortune’s Keep, Rebirth, and Ashika, the same rules hold. Learn the funnels. Respect the rooftops. Use the water. And yeah, keep a smoke or two. I toss smokes like confetti. Proud of it.
Oh, almost forgot to say this clearly again: the phrase best landing spots warzone gets thrown around like it’s a secret list. It’s not. It’s a process. Learn the process and you can swap POIs whenever the devs decide to move the furniture around. And they will. Always.
Anyway, I’m queueing after this. If I get beamed off a zip at 200 meters because someone has grandma’s reaction time and demon aim, I’ll pretend it didn’t happen. If I win, I’ll pretend it was skill and not luck. That’s the game.
FAQs (stuff people keep asking me)
- Q: What’s the safest drop if my squad keeps dying off rip?
A: On big maps, go Power Plant or a quieter coastal block with a contract. On Resurgence, Smuggler’s Cove or Harbor-type areas. Money first, then fights. - Q: How do I stop getting third-partied?
A: Don’t tunnel. Clear your immediate area, armor up, reload, then reposition one building over. Pop a UAV before you sprint into unknowns. - Q: Should I land Stronghold buildings pre-open?
A: Only if you have an exit plan and decent loot spawns nearby. Otherwise, wait for the announcement, then crash it from 30 meters out with smokes. - Q: Best solo landing approach?
A: Rooftops with two exits, a contract nearby, and a buy within 150 meters. Avoid bowls, courtyards, and window farms. - Q: Do patches really change where I should land?
A: Yep. Check new patch notes after big updates. Small loot tweaks turn okay drops into S-tier for a week.
And yeah—if you made it this far, congrats. You’re already ahead of the folks auto-dropping Keep with zero plates. I’ll see you in the canals. Oh—last thing: if someone asks me again for my “secret” best landing spots warzone list, I’m just going to send them this and go make coffee.

James Carter: Your competitive edge. I cover Patch Notes, Speedruns, Battle Royale Strategy, Multiplayer Trends, and Game Dev Insights. Let’s get into it!

Loving the mix of strategy and fun in these Warzone landing spot tips. Great insight and variety!
Love the detailed breakdown of landing spots! Valuable tips for maximizing loot and rotations in Warzone. Great read!
Great article, love the approach to strategy. Smart thinking with the three rules for choosing landing spots!
Be strategic and take risks to maximize your Warzone drops; love the detail in your analysis.
What makes Vondel Museum/City Hall block a risky but strategic Warzone landing spot?